Back in early June 2023 when smoke from the Canadian wildfires was sitting over the east coast of the US, I, like many others, became much more aware of and interested in the quality of the air around me. I ended up buying one of these AirGradient DIY Basic sensor platforms that combines a CO2 sensor with particulate sensor that reports PM1.0, PM2.5, and PM10 particular concentrations, as well as temperature and humidity.
The AirGradient unit seems like a good choice because the sensors, while not too expensive, were well-enough regarded by commenters in the discussion threads I was reading and because the product is very DIY friendly. It's based around one of the ubiquitous ESP8266 chips that can be easily programmed in a bunch of ways and integrated neatly into a variet of systems, including HomeAssistant. I run a little HomeAssistant setup in my apartment so the ease of integrate was a big selling point for me. And at $67, the DIY kit didn't feel too pricy, especially on those really smoky days in early June.
The kit arrived today and I'm happy to report it's now working great! Here are some build notes:
Build Notes
-
Found the list of assembly instructions here
- The specific instructions I needed were for the DIY Basic v3 instructions
-
Here are all the parts unpacked:
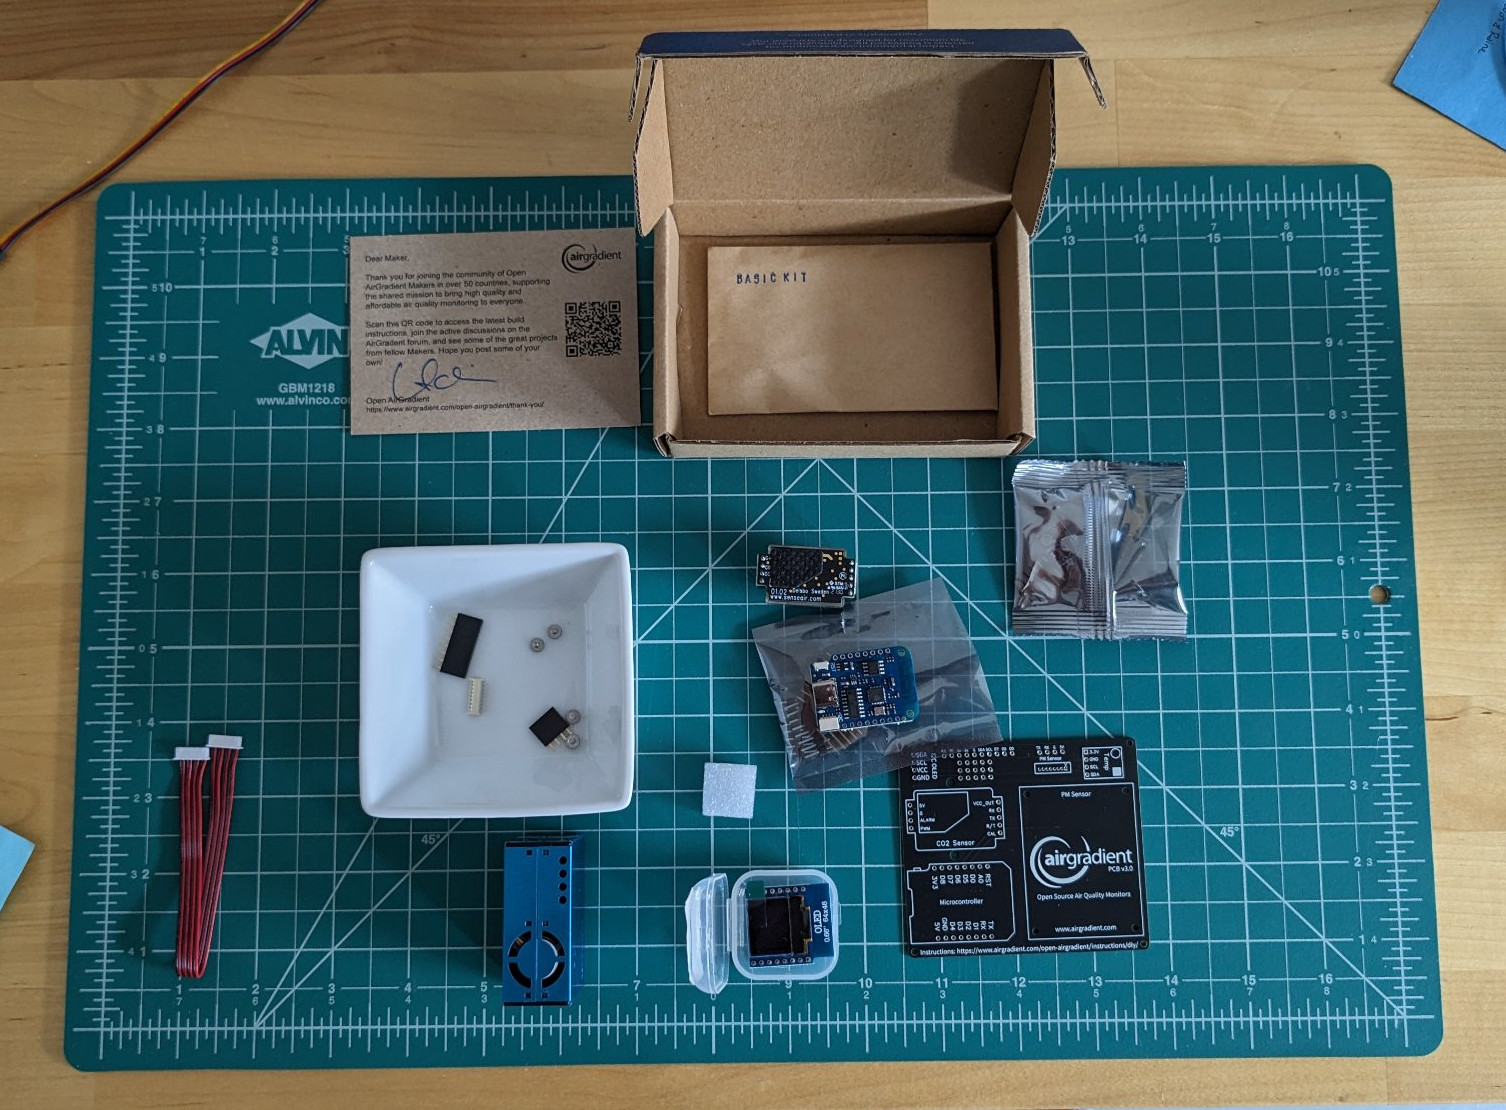
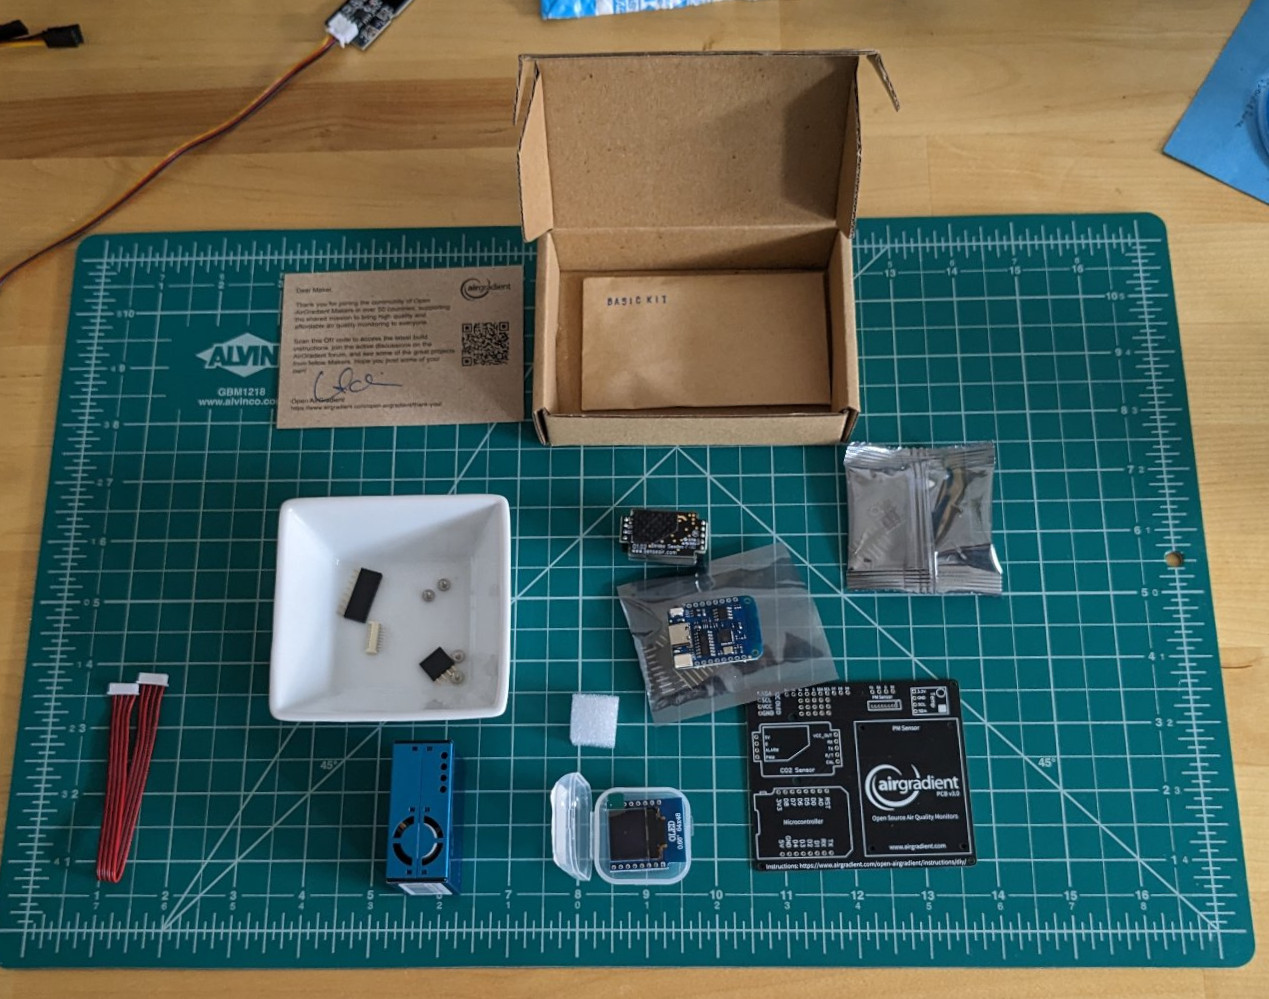
-
Soldering went along easily enough:
- Nice to use the footprints on the PCB to keep header pins aligned when soldering:
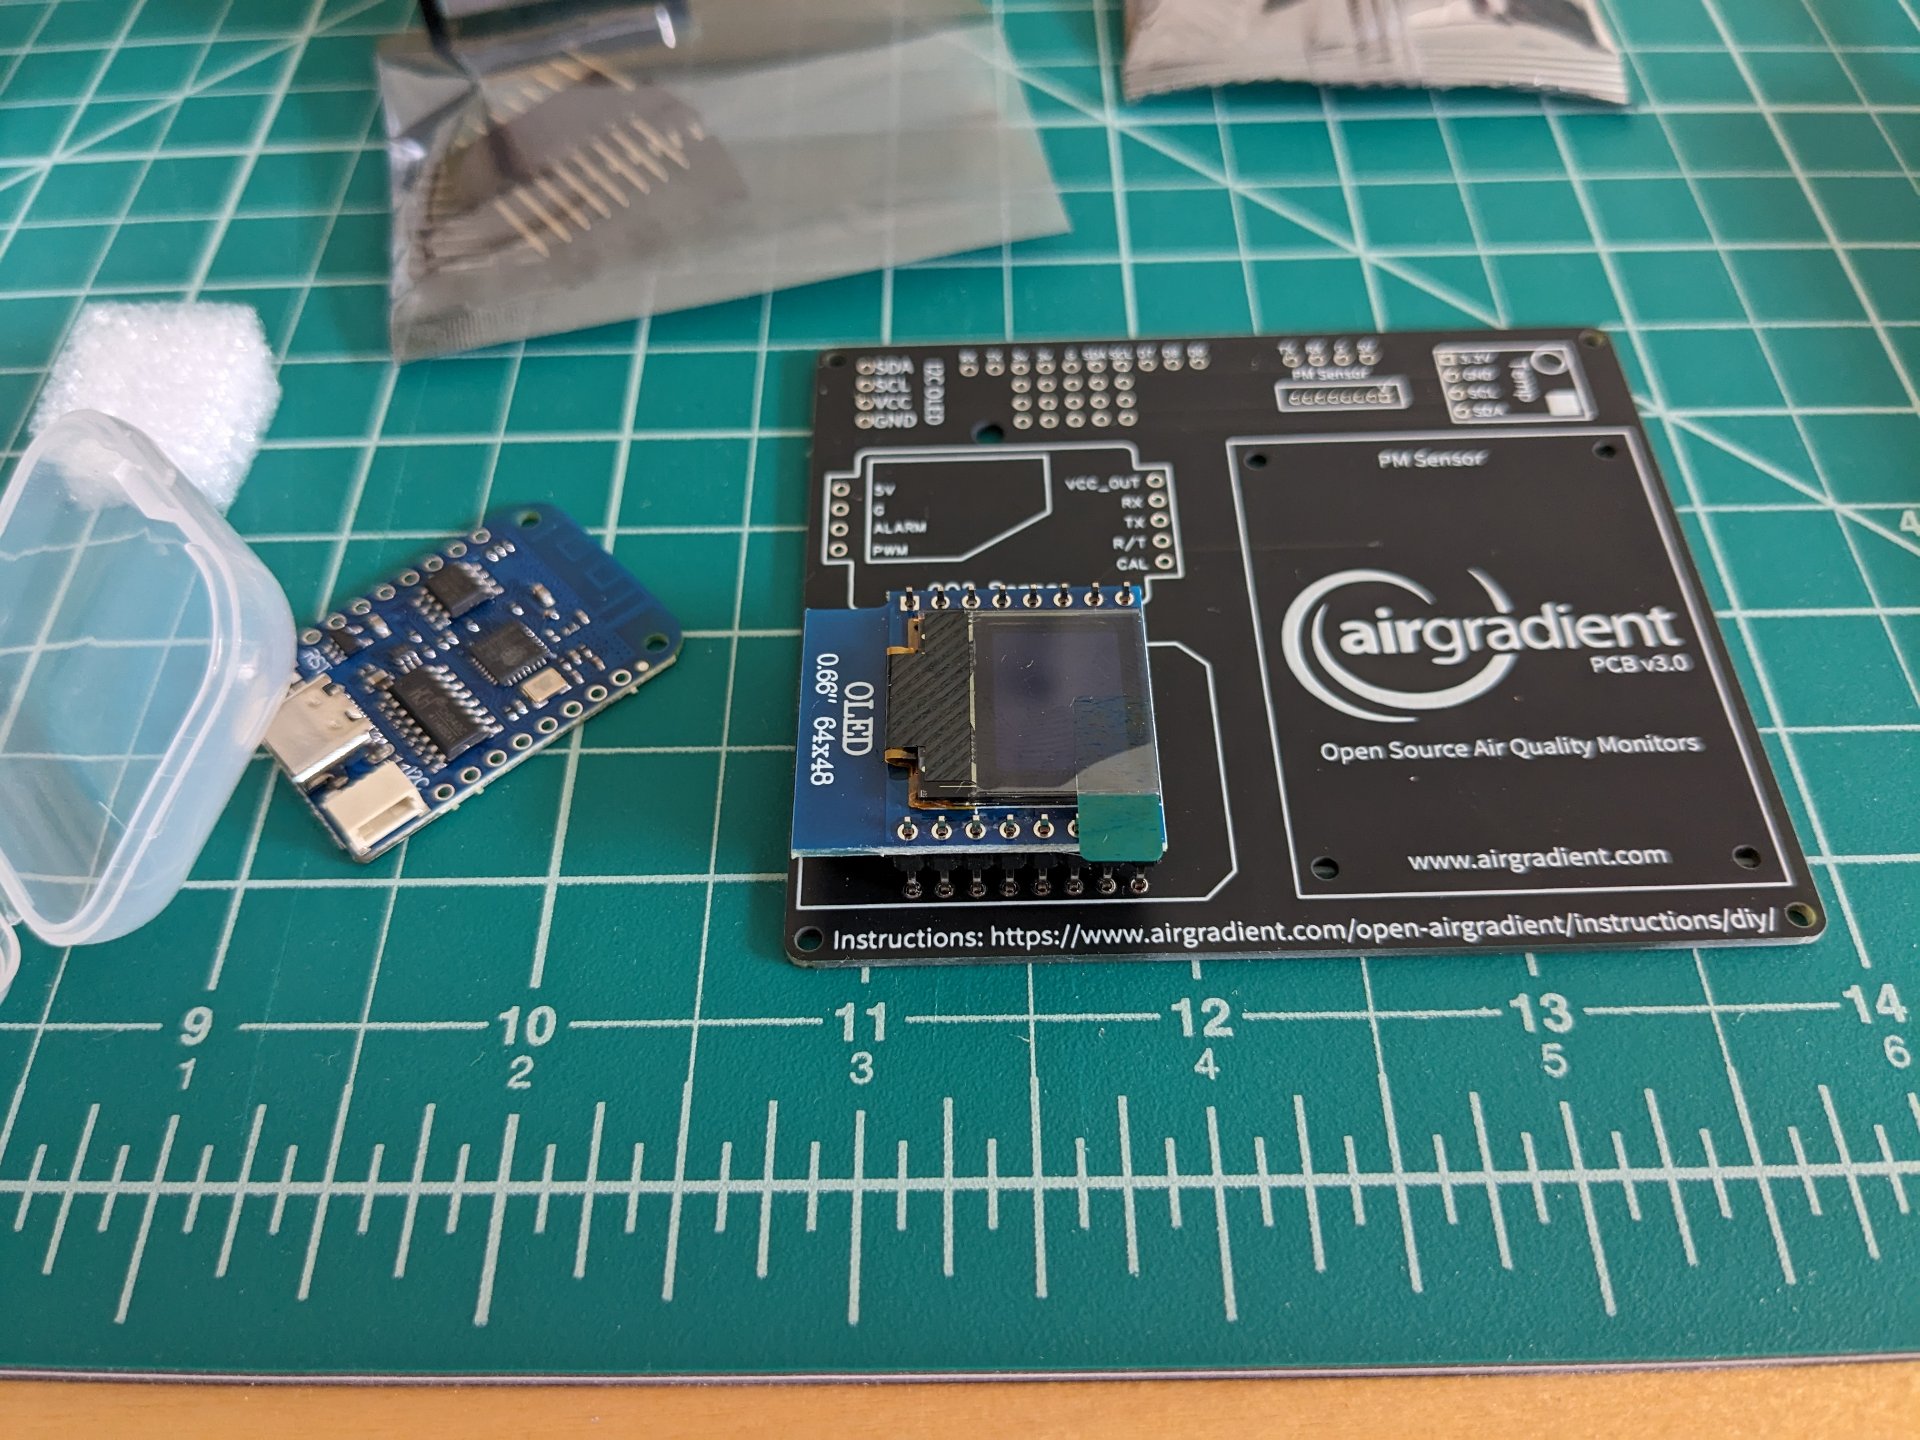
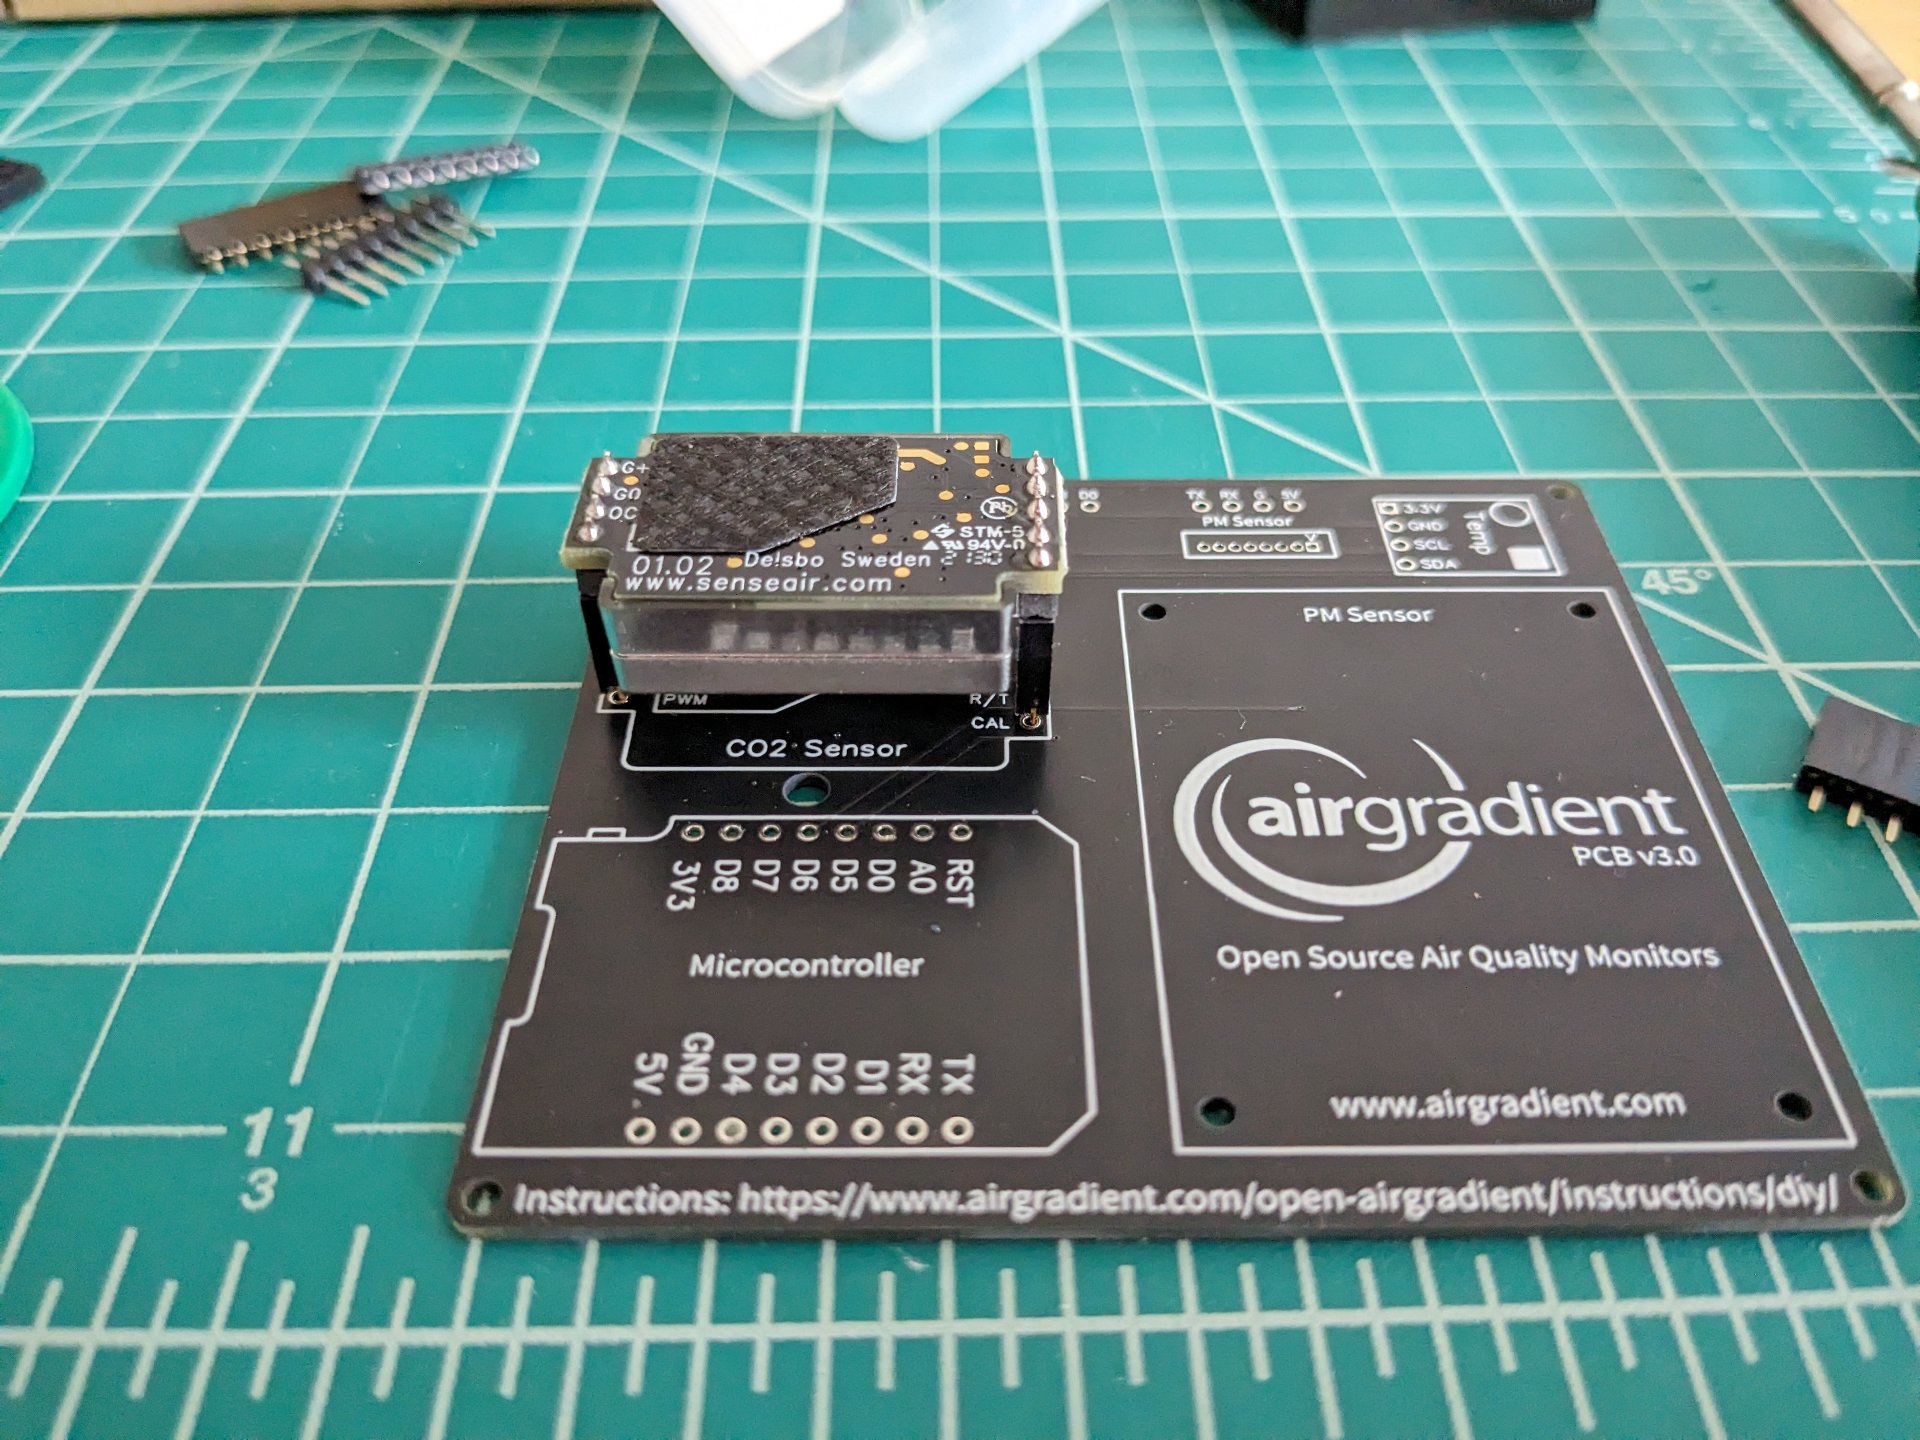
- Nice to use the footprints on the PCB to keep header pins aligned when soldering:
-
I thought the instructions to solder the long headers onto the ESP board were odd, but this worked out well as the OLED display could plug into the female header and the long pins could could be soldered straight to the PCB to mount the ESP board to it:
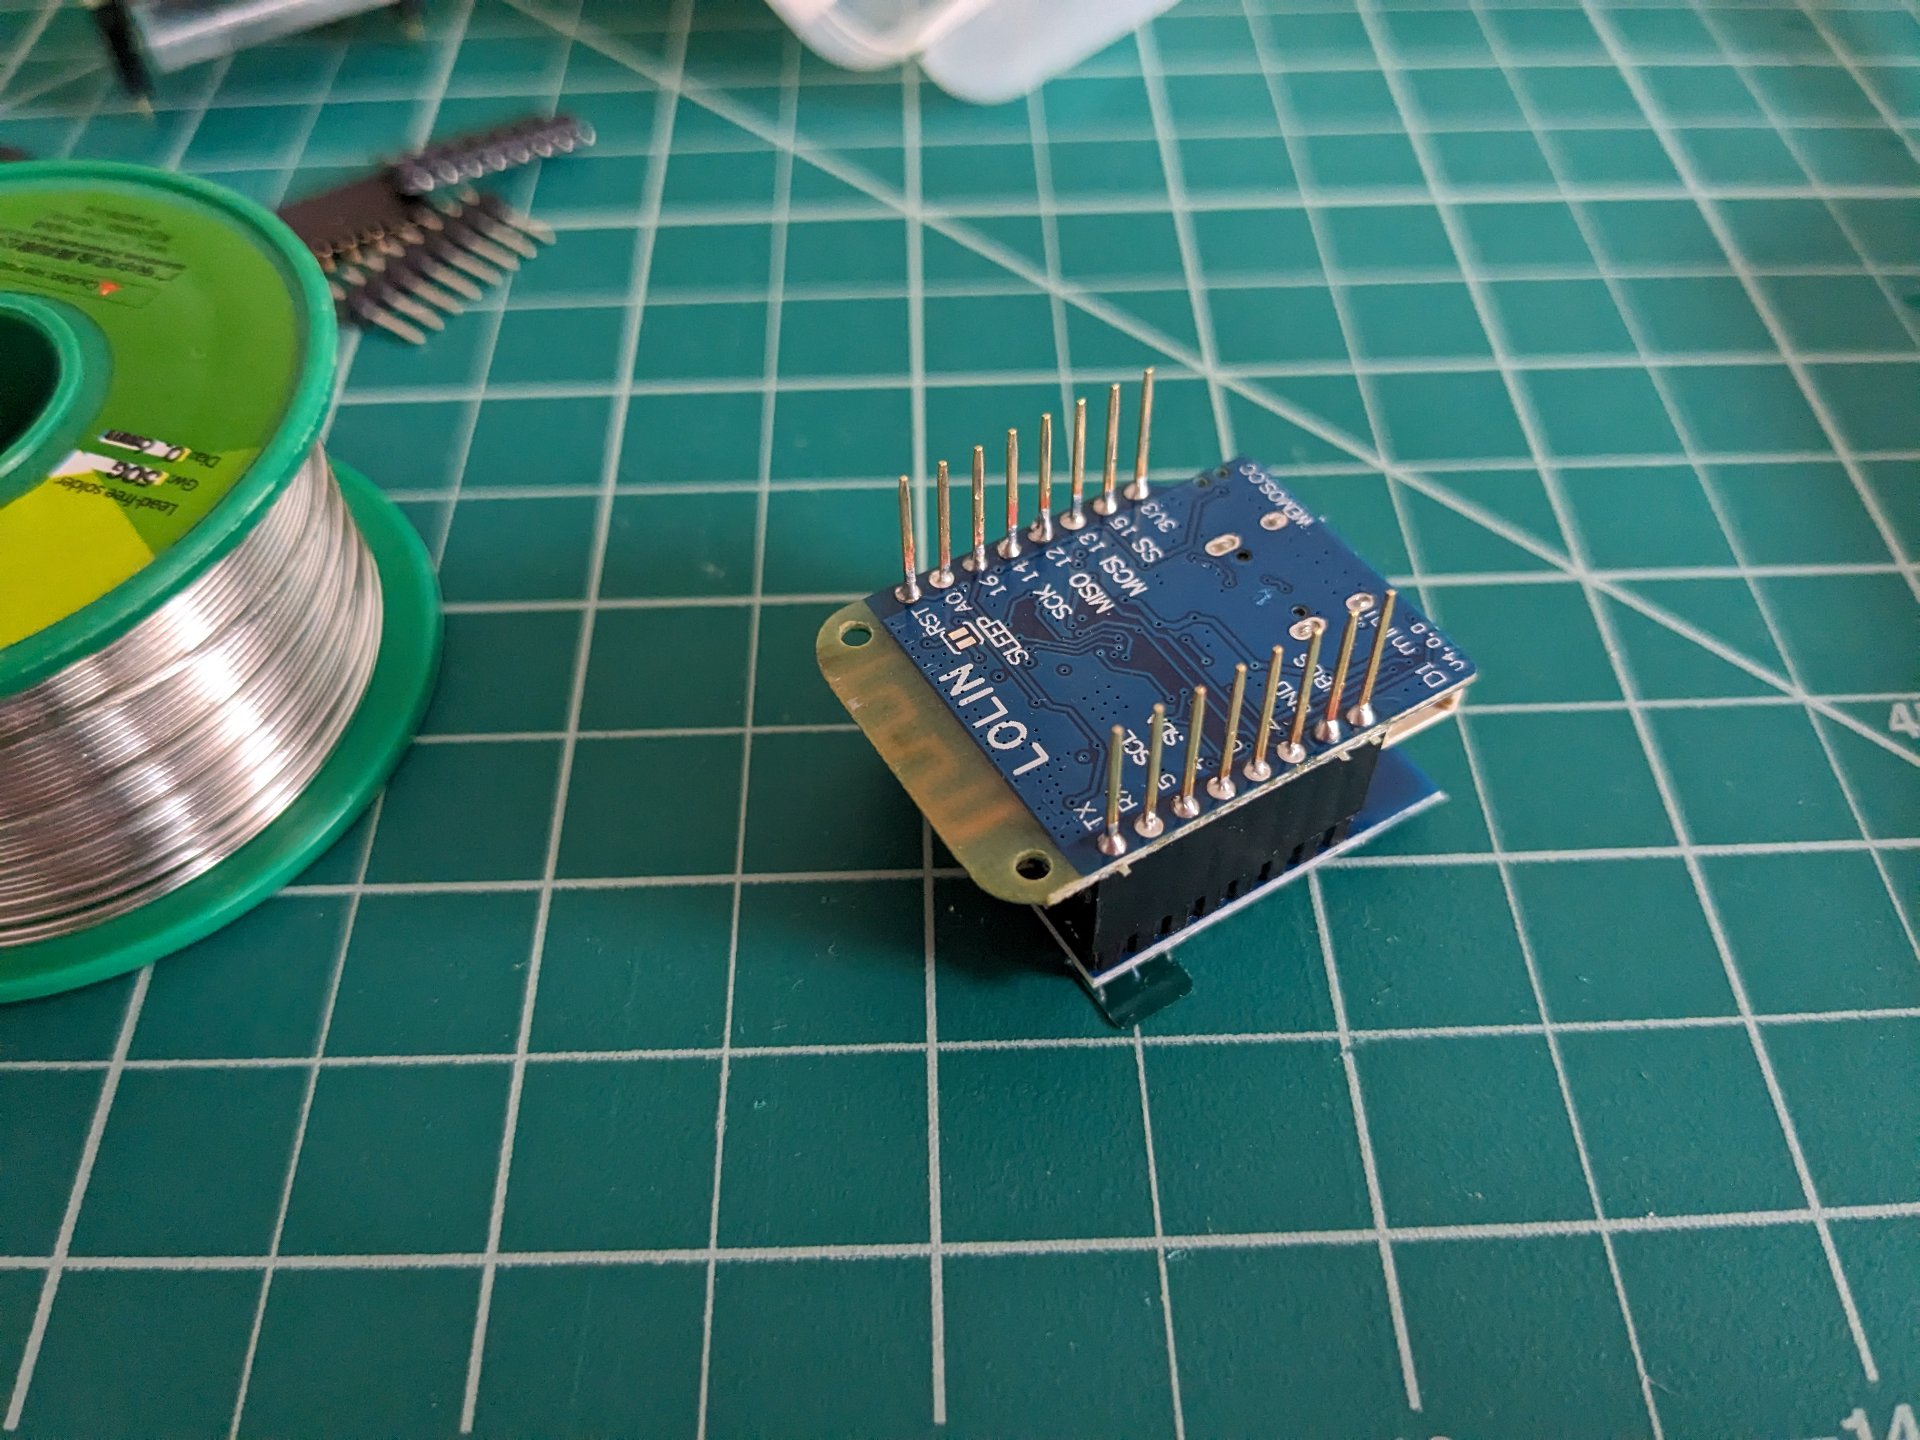
-
The instructions don't mention what to do with this white connector for particular sensor cable, but I found that this was the correct orientation:
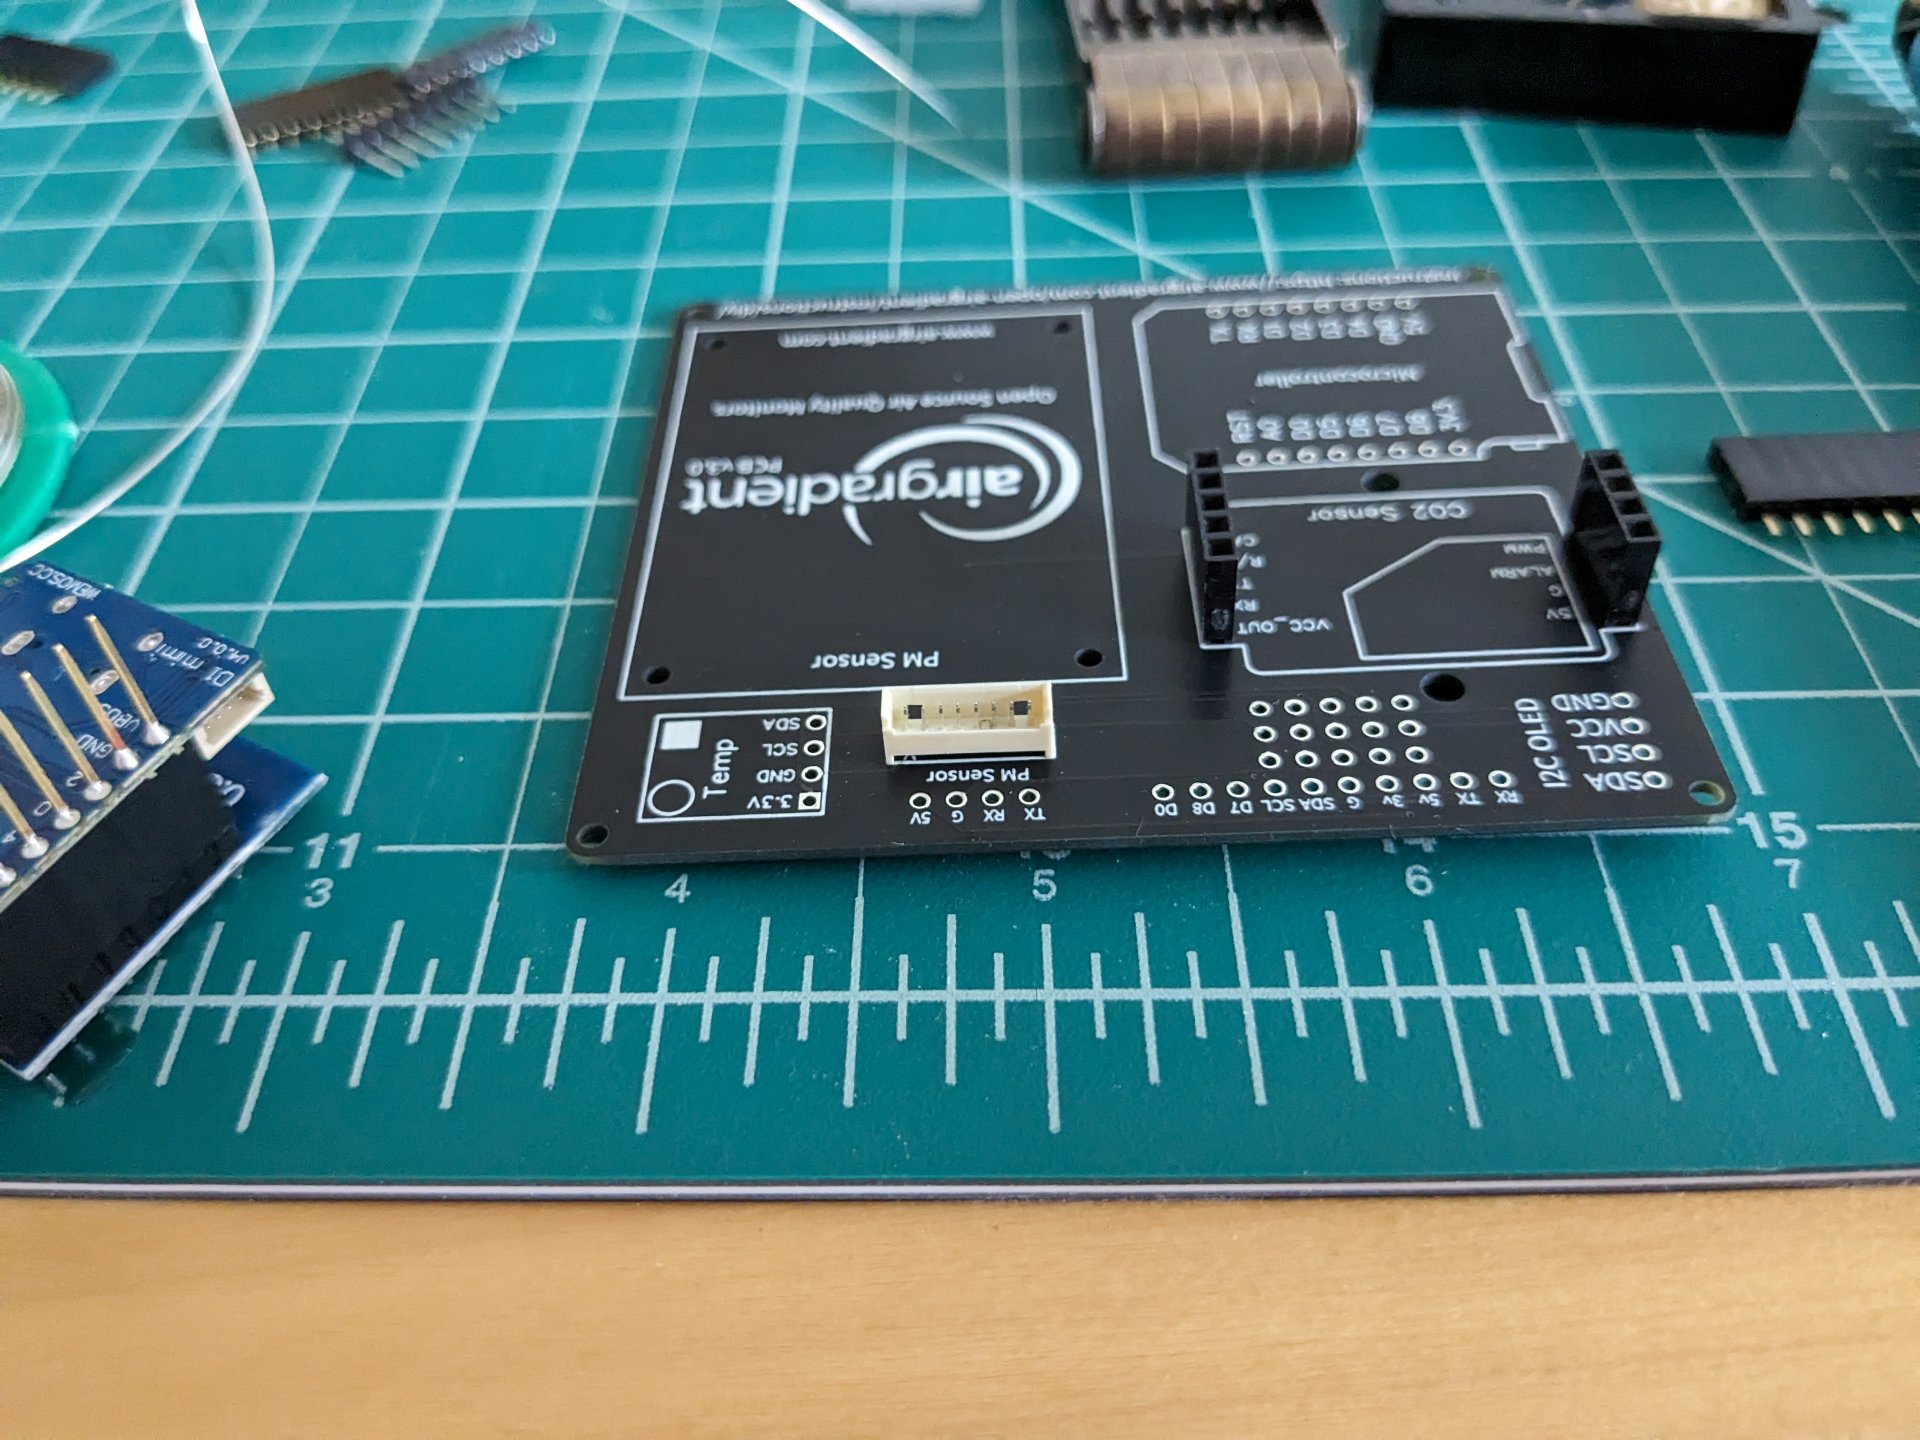
- The instructions describe cutting up the particulate sensor's cable and soldering it directly to the board, but it's much nicer to use this pluggable connector if your kit includes it
-
I used some extra male header pins and two unused holes on the temperature and humidity sensor board to prop up the board for easier solding. Note that the two pins on the left here are not actually soldered in and aren't present in the final picture on the right:
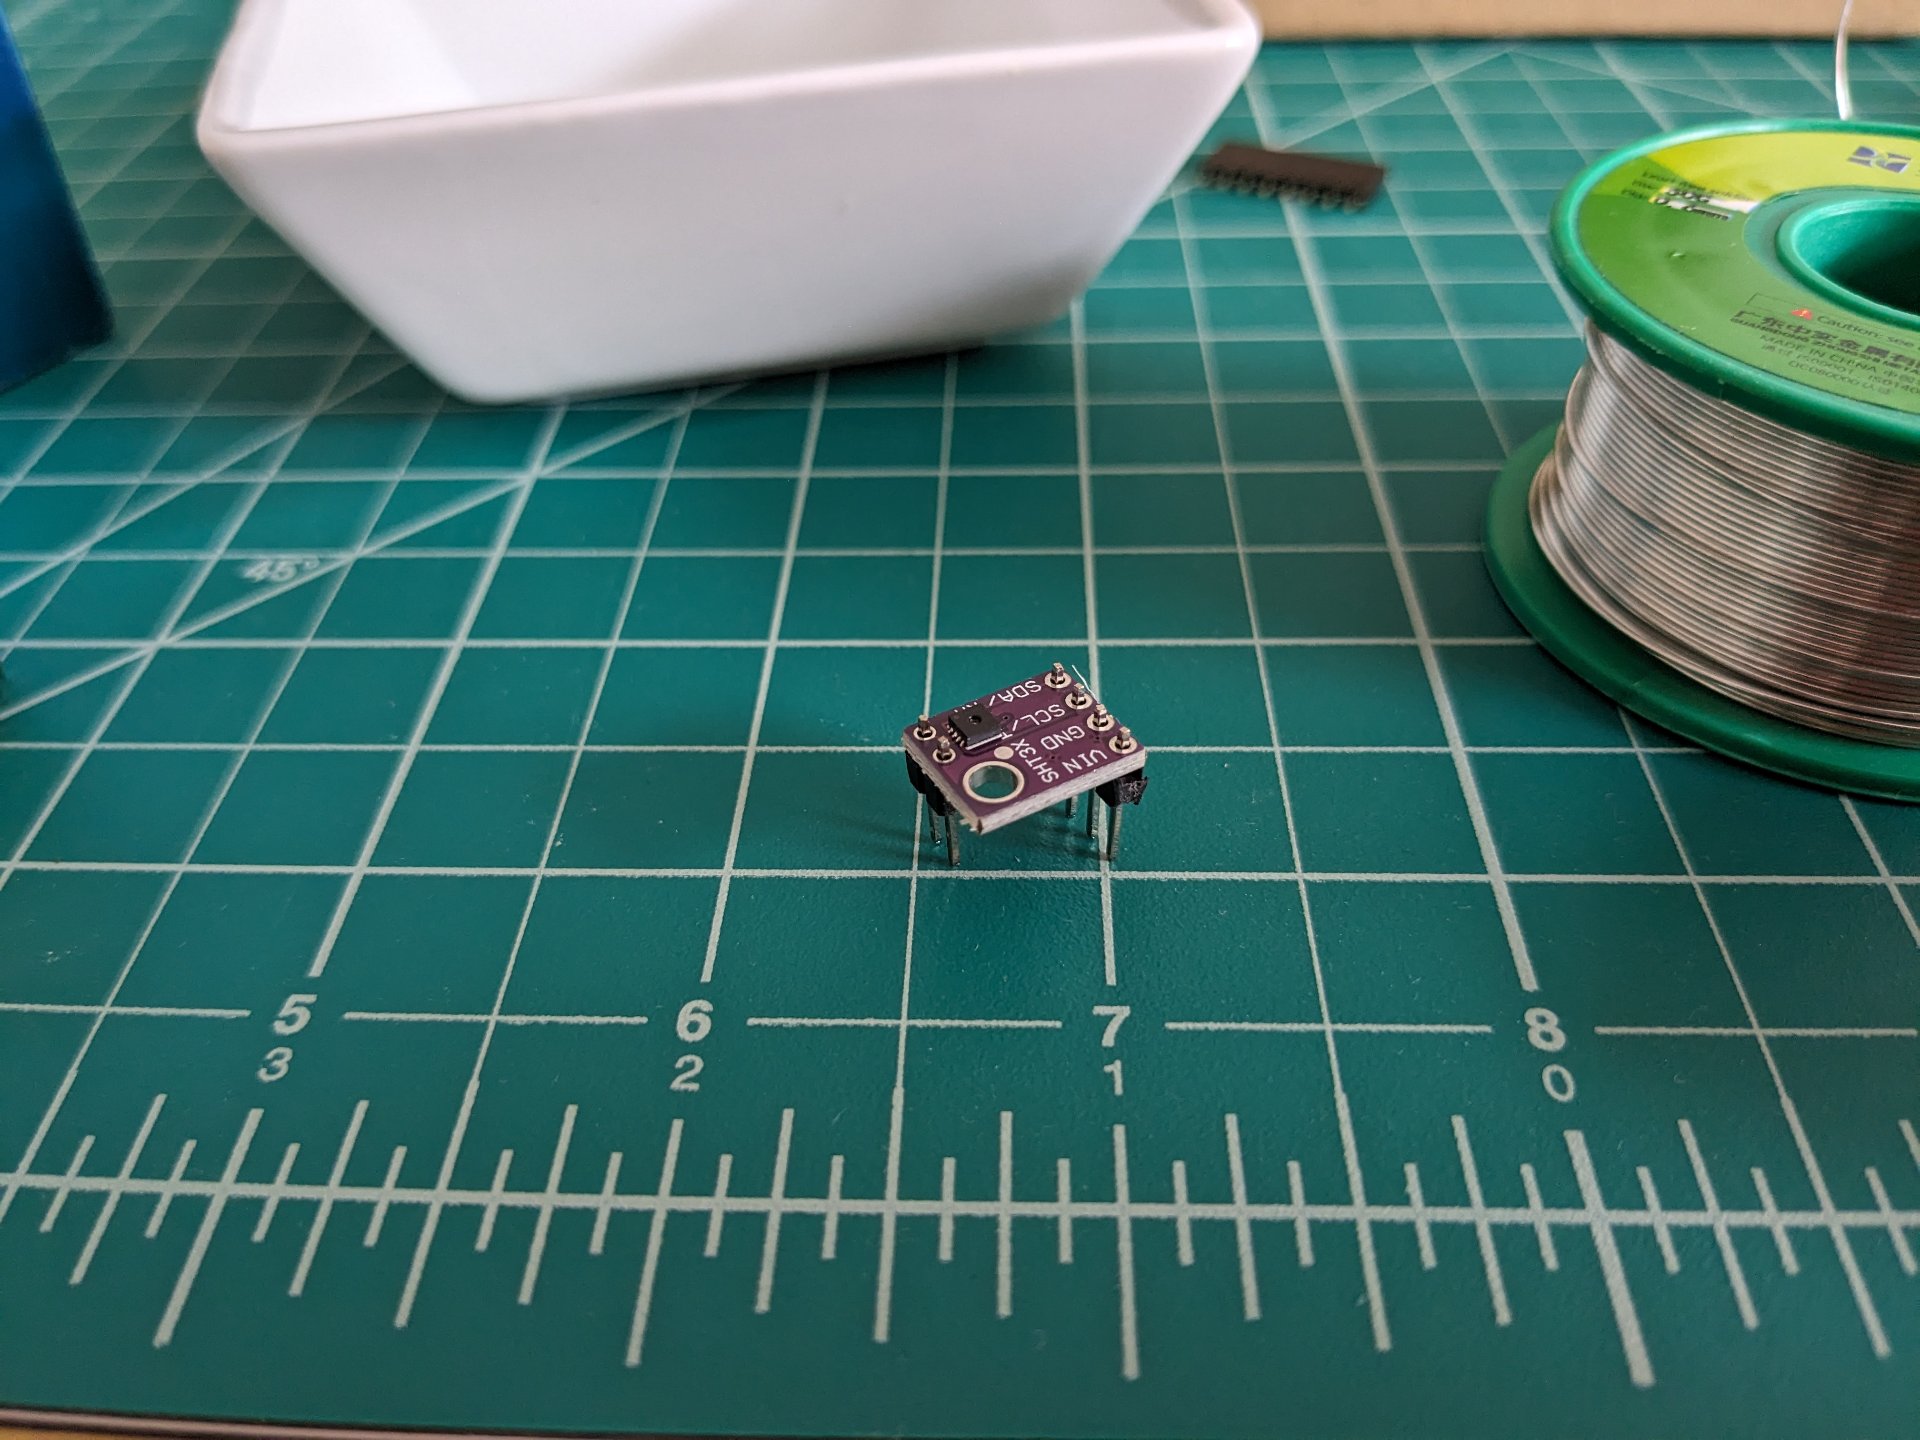
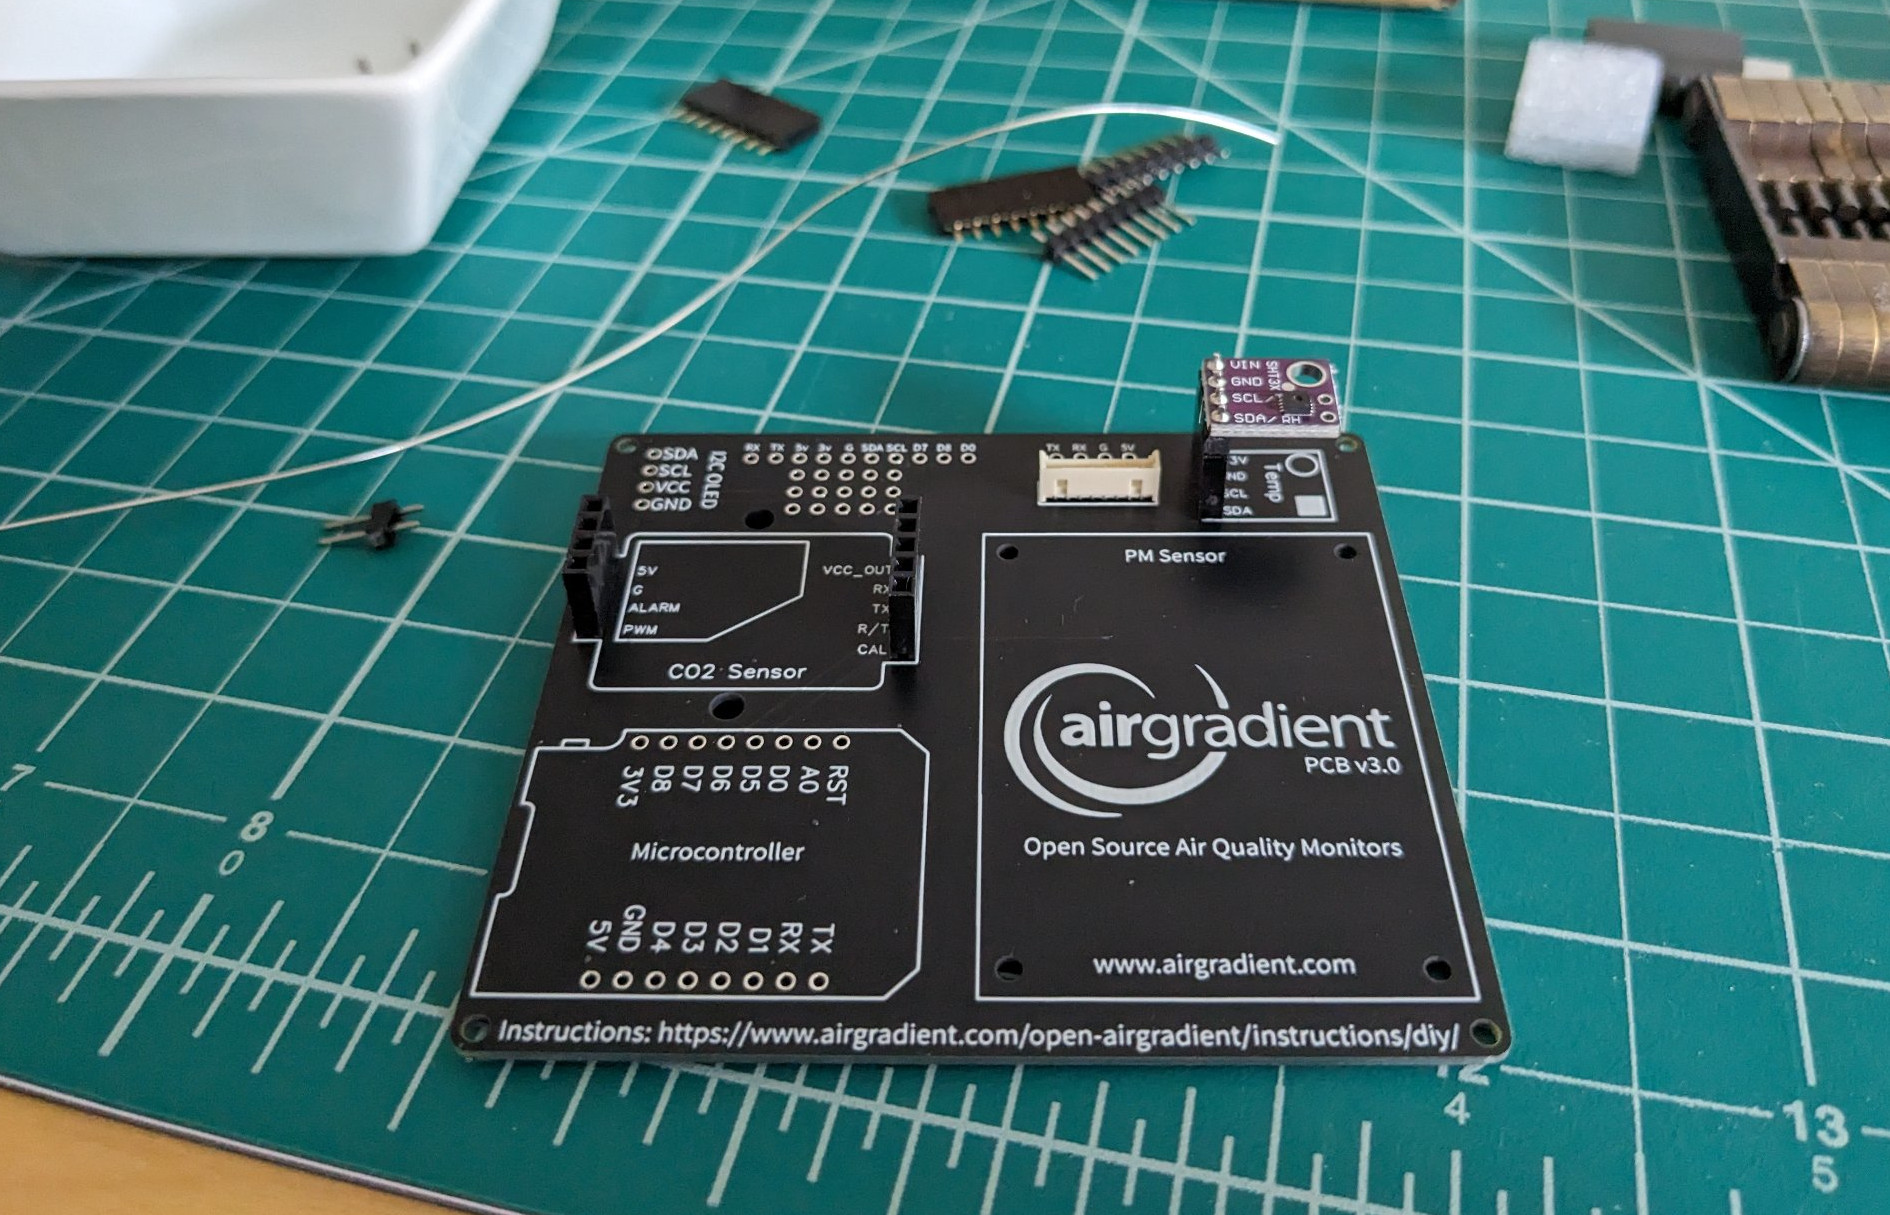
-
Ready for programming! (feat. a Pinecil soldering iron!)
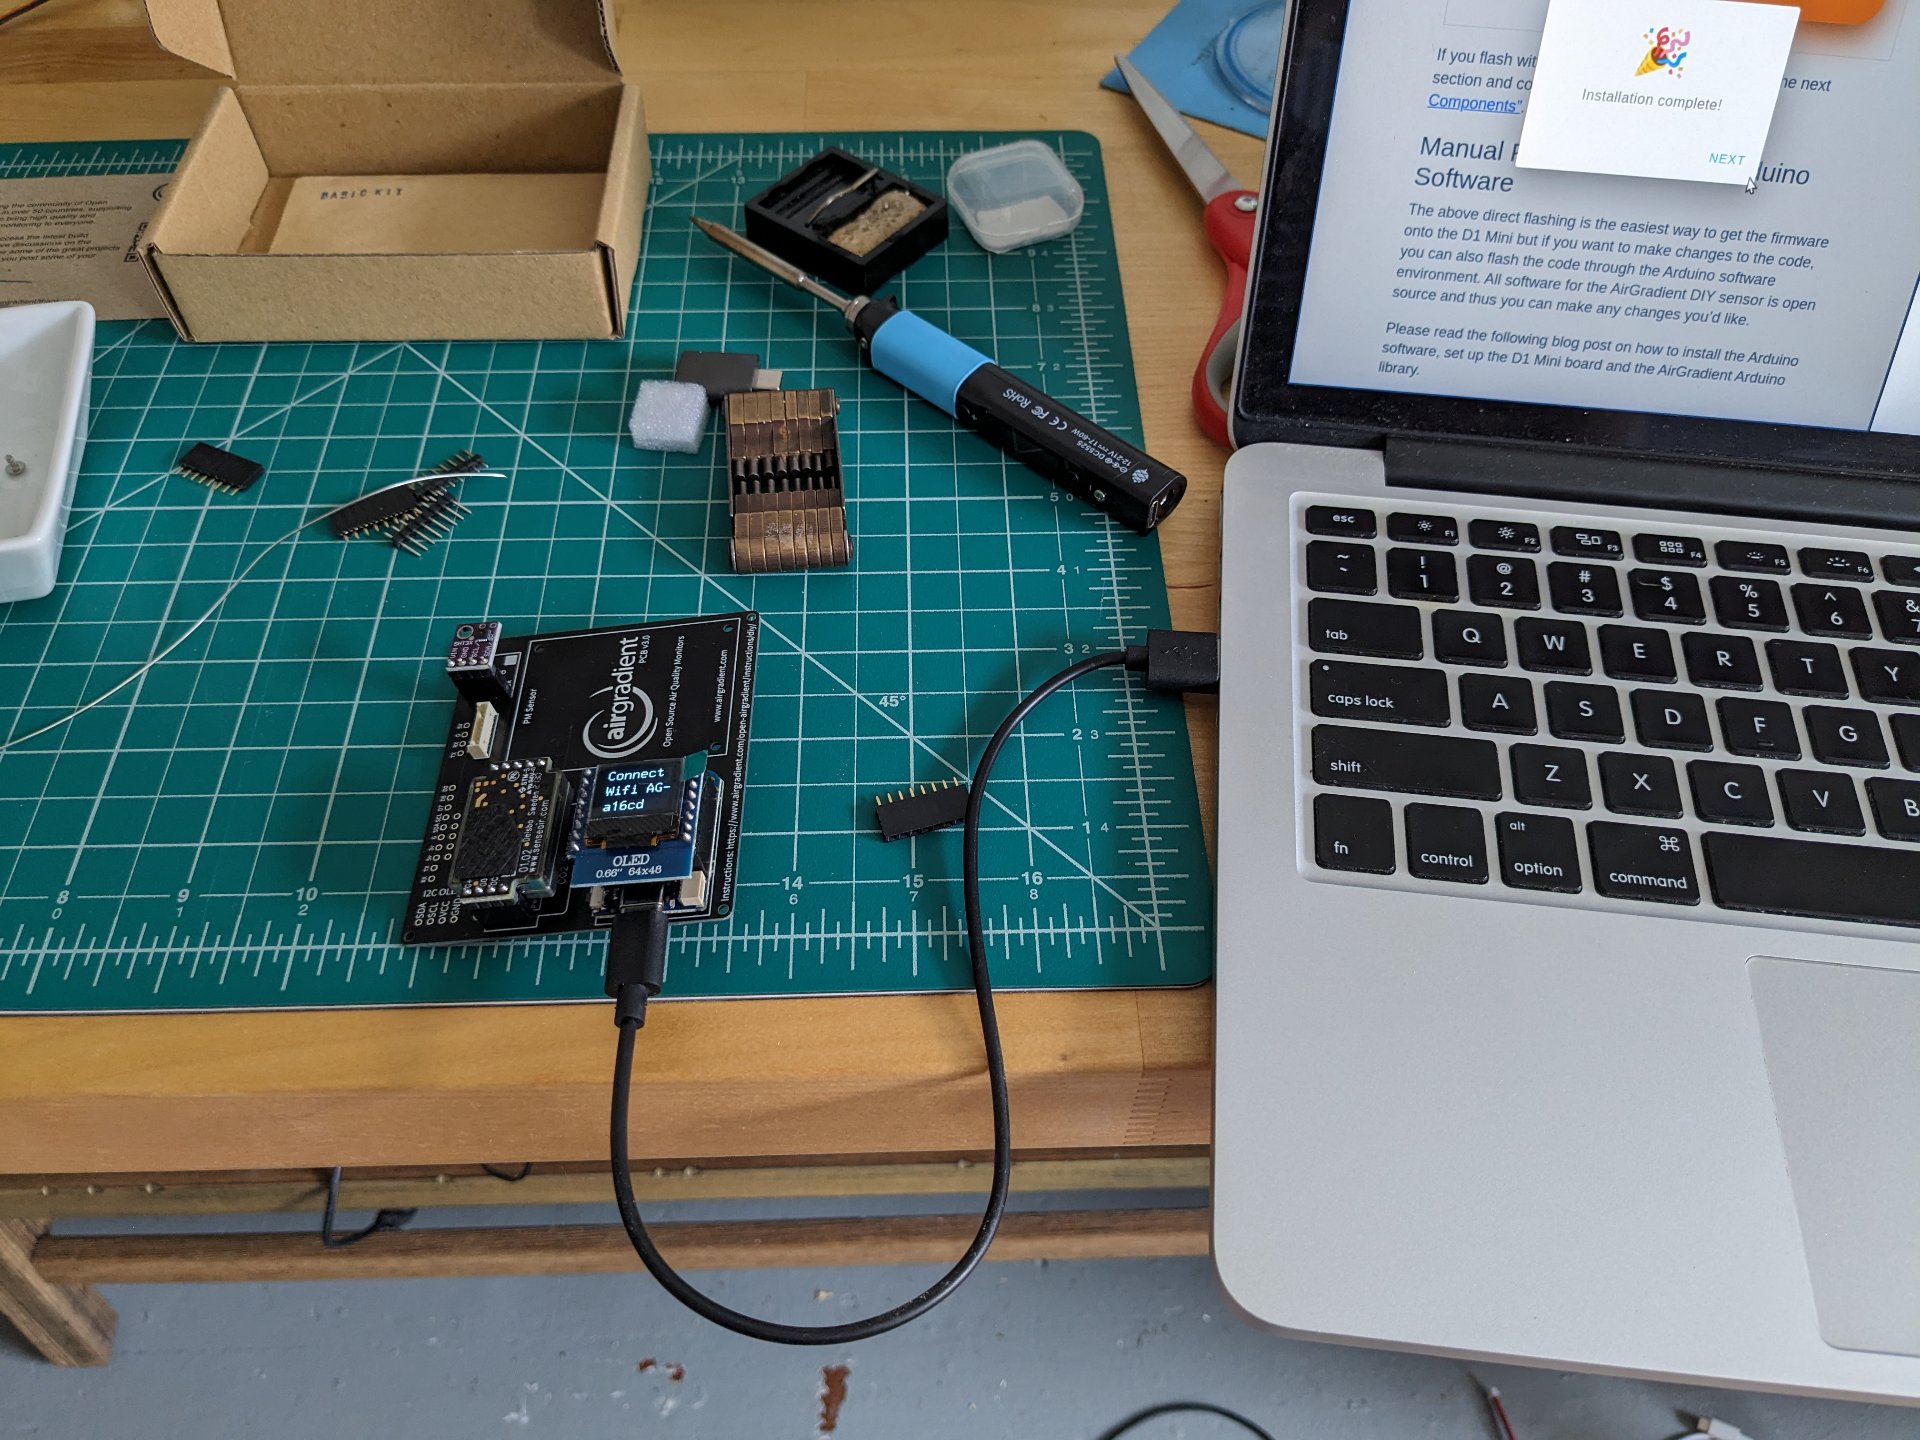
Blue particulate sensor isn't attached here!
Programming Notes
- Installed the AirGradient firmware directly from the web flasher in the instructions
page
- Very cool that the web flasher works! I think it only works in Chrome but still
- Connected the board to my WiFi network and started to see sensor readings on the OLED!
- Ran through the AirGradient account creation process
- I wasn't able to see any of the data my board was presumably sending to the AirGradient servers
- I think this might have been because my device had a leading zero in its 6-digit ID... should probably send the AirGradient team a note about this
- Time to try a new firmware. ESPHome is the recommended route for using this board with HomeAssistant anyway, so I'll replace the AirGradient firmware with a custom ESPHome firmware.
- I found an AirGradient ESPHome config in ajfriesen/ESPHome-AirGradient that was recommended in a
couple different subreddits. In particular I used the air-gradient-diy.yaml
- The ESPHome project is based on YAML configuration files that define the capabilities of an ESP8266- or ESP32-based project. The YAMLs are used to autogenerated programs that are then compiled and uploaded onto the ESP chips
- Installing ESPHome
- There are a lot of options for how to install the part of the ESPHome project needed to compile programs
- I had a couple false starts, including installing ESPHome on the computer where I run HomeAssistant, installing it in the docker-compose file that defines my HomeAssistant, and trying to use another web-based programmer. These all didn't work perfectly for different reasons
- What I eventually settled on was installing ESPHome on my laptop using the Docker instructions shown
here.
- The command I used to run this locally was:
That was run in a directory containing my project files:
docker run --rm --privileged -v "${PWD}":/config --device=/dev/ttyUSB0 -it ghcr.io/esphome/esphome run livingroom.yamldocker run --rm --privileged -v "${PWD}":/config --device=/dev/ttyUSB0 -it ghcr.io/esphome/esphome run livingroom.yaml~/Desktop/Projects/ESPHome$ ls air-gradient-diy.yaml font orig secrets.yaml ~/Desktop/Projects/ESPHome$ ls font/ arial.ttf monofonto.ttf monofonto.ttf.1 monofont.ttf
~/Desktop/Projects/ESPHome$ ls air-gradient-diy.yaml font orig secrets.yaml ~/Desktop/Projects/ESPHome$ ls font/ arial.ttf monofonto.ttf monofonto.ttf.1 monofont.ttf - The fonts were the main reason I ran this locally - I couldn't figure out how to get them linked into the ESP program any other way.
- The
secrets.yamlfile contains some WiFI info and looks like this:# Your Wi-Fi SSID and password wifi_ssid: "My Home Wifi" wifi_password: "thewifipassword" fallback_ssid_password: "" ota_password: ""
# Your Wi-Fi SSID and password wifi_ssid: "My Home Wifi" wifi_password: "thewifipassword" fallback_ssid_password: "" ota_password: "" - I tweaked ajfriesen's YAML config file a bit and ended up with this version of my own: air-gradient-diy.yaml
- The main differences are:
- Commented out the
switchandbuttonsections (not sure what those are for, and they generated compiler errors) - Switched fonts
- Changed what goes on the display (big font for CO2 ppm)
- Enabled PM1.0 and PM10 measurements
- Changed measurement interval from 5 seconds to 60 seconds. Apparently this extends the life of the CO2 and PM sensors
- Commented out the
- Ran into an odd issue with the OLED display, which coincidentally seems to have popped up in ESPHome on exactly the day I was working on this. There's a good discussion thread here on Github.
- Solved by adding a
it.fill(Color::BLACK);call before writing text to the OLED
- The command I used to run this locally was:
HomeAssistant
With the ESPHome program generated by my copy of air-gradient-diy.yaml loaded
onto my AirGradient board, HomeAssistant just picked it right up! A little playing around with HomeAssisant
sensor plot cards later and I have these sweet graphs of the particulate matter and CO2 around me:
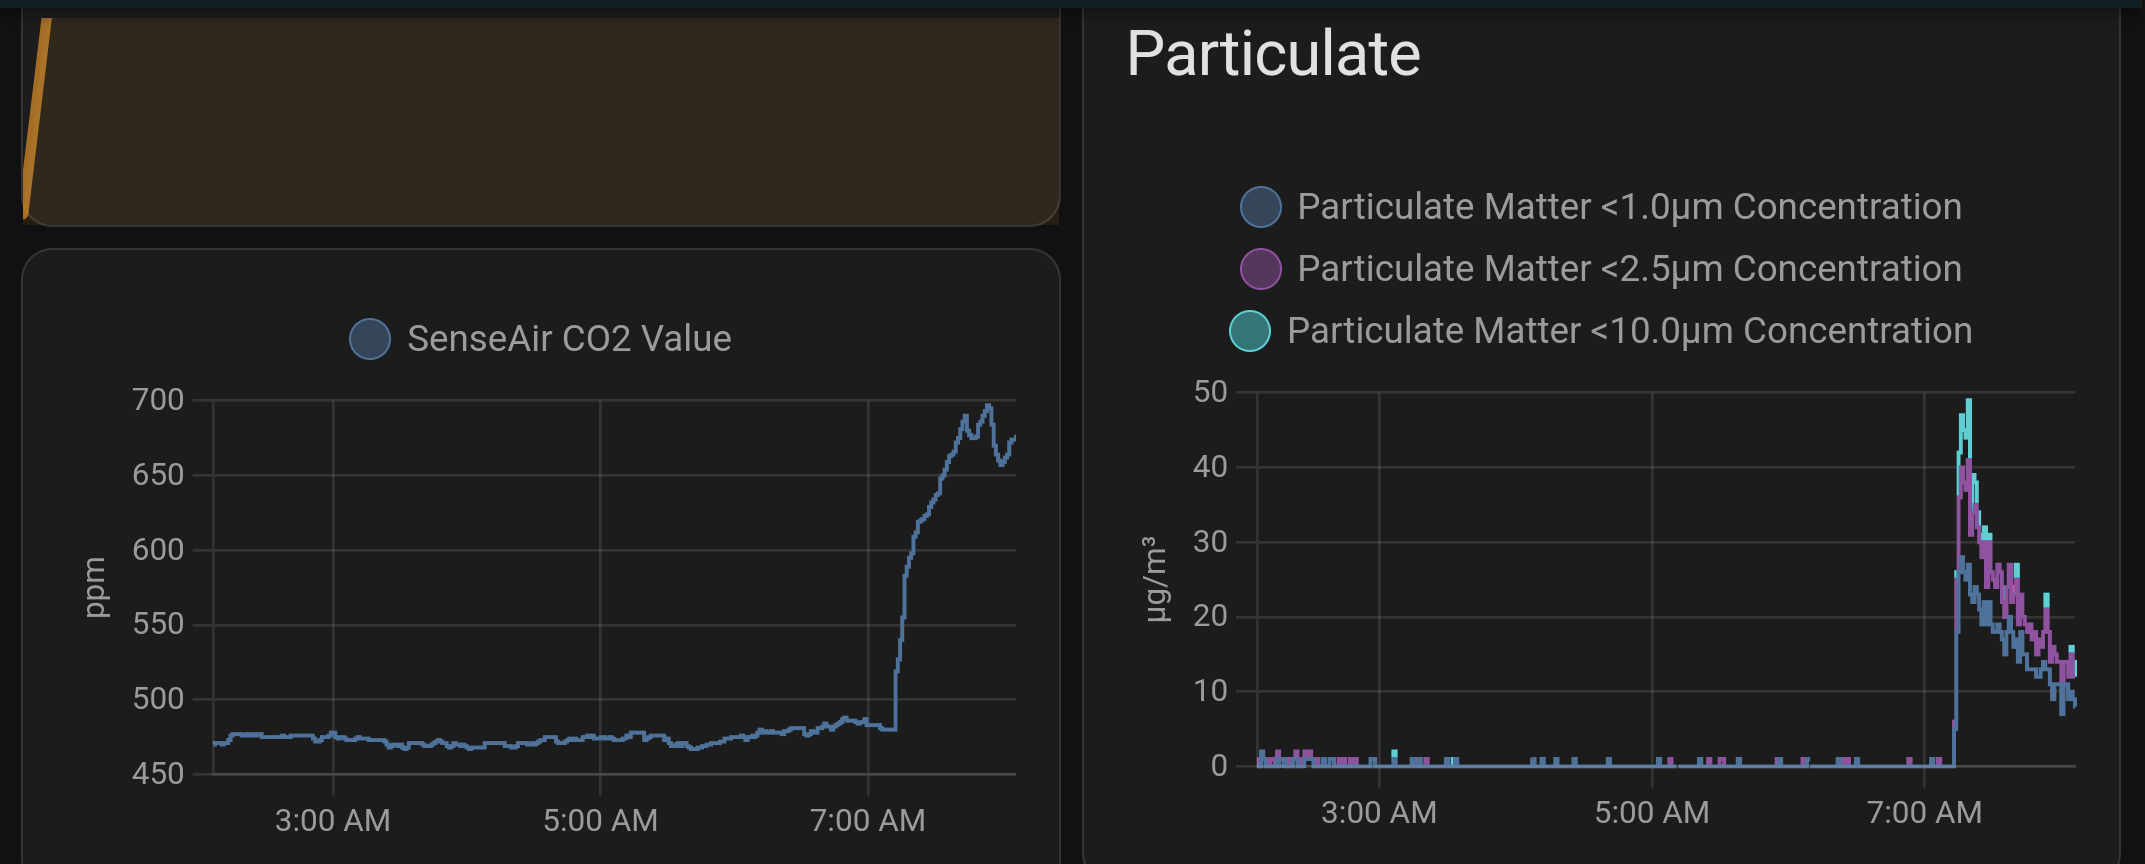
Crazy! I've only had this going a day so far but it's fascinating to see how the CO2 changes when I enter or leave a room and how much cooking affects the PM readings. Very excited to continue to monitor this information!